Are you considering installing an Emporia EV Charger at home to power up your electric vehicle efficiently? You’re in the right place.
Installing an EV charger might sound daunting, but it doesn’t have to be. With the right guidance, you can have your charger up and running in no time, saving you countless trips to public charging stations. Imagine the convenience of waking up every morning to a fully charged car, ready to tackle the day.
In this guide, you’ll discover simple steps to install your Emporia EV Charger, ensuring a smooth and hassle-free experience. Ready to empower your home with clean energy? Let’s dive in and make it happen!
Preparation And Planning
Installing the Emporia EV Charger requires careful preparation and planning. Gather necessary tools and read the installation manual. Check compatibility with your home’s electrical system before starting.
Embarking on the journey to install your Emporia EV Charger can be thrilling, especially when you know exactly what steps to take. Preparation and planning are crucial to ensure a smooth and efficient installation process. Taking the time to plan properly can save you from unnecessary headaches and unexpected costs. Let’s dive into the essential steps of preparation to make your installation as straightforward as possible. ###Assess Electrical Requirements
Before you can start installing your Emporia EV Charger, understanding your home’s electrical capacity is key. Check your home’s electrical panel to see if it can handle the additional load of an EV charger. You might need a 240-volt circuit, which could require an upgrade if your current system isn’t capable. Consider consulting a licensed electrician to assess whether your current electrical setup is sufficient. They can provide professional advice and ensure your installation complies with local electrical codes. Are you aware of any electrical upgrades needed in your home? Identifying them early can prevent delays and additional costs later. ###Select Installation Location
Choosing the right spot for your charger is more important than you might think. Ideally, the location should be close to your electrical panel to minimize wiring complexity. You also want it to be convenient for your EV’s parking spot. Think about weather protection if the charger will be outdoors. An area shielded from direct exposure to elements like rain or extreme sun can extend the life of your charger. Have you considered how the location affects your daily routine? Place the charger where it will be most convenient for regular use. ###Gather Necessary Tools And Materials
Having the right tools and materials on hand can make the process smoother. Common tools include a drill, screwdriver, and wire stripper. You’ll also need mounting brackets, screws, and electrical conduit if required. Create a checklist of all necessary materials to avoid last-minute trips to the hardware store. This preparation ensures you have everything you need at your fingertips. Have you checked if you have all the tools in your toolbox? Preparing them in advance can save you significant time and effort.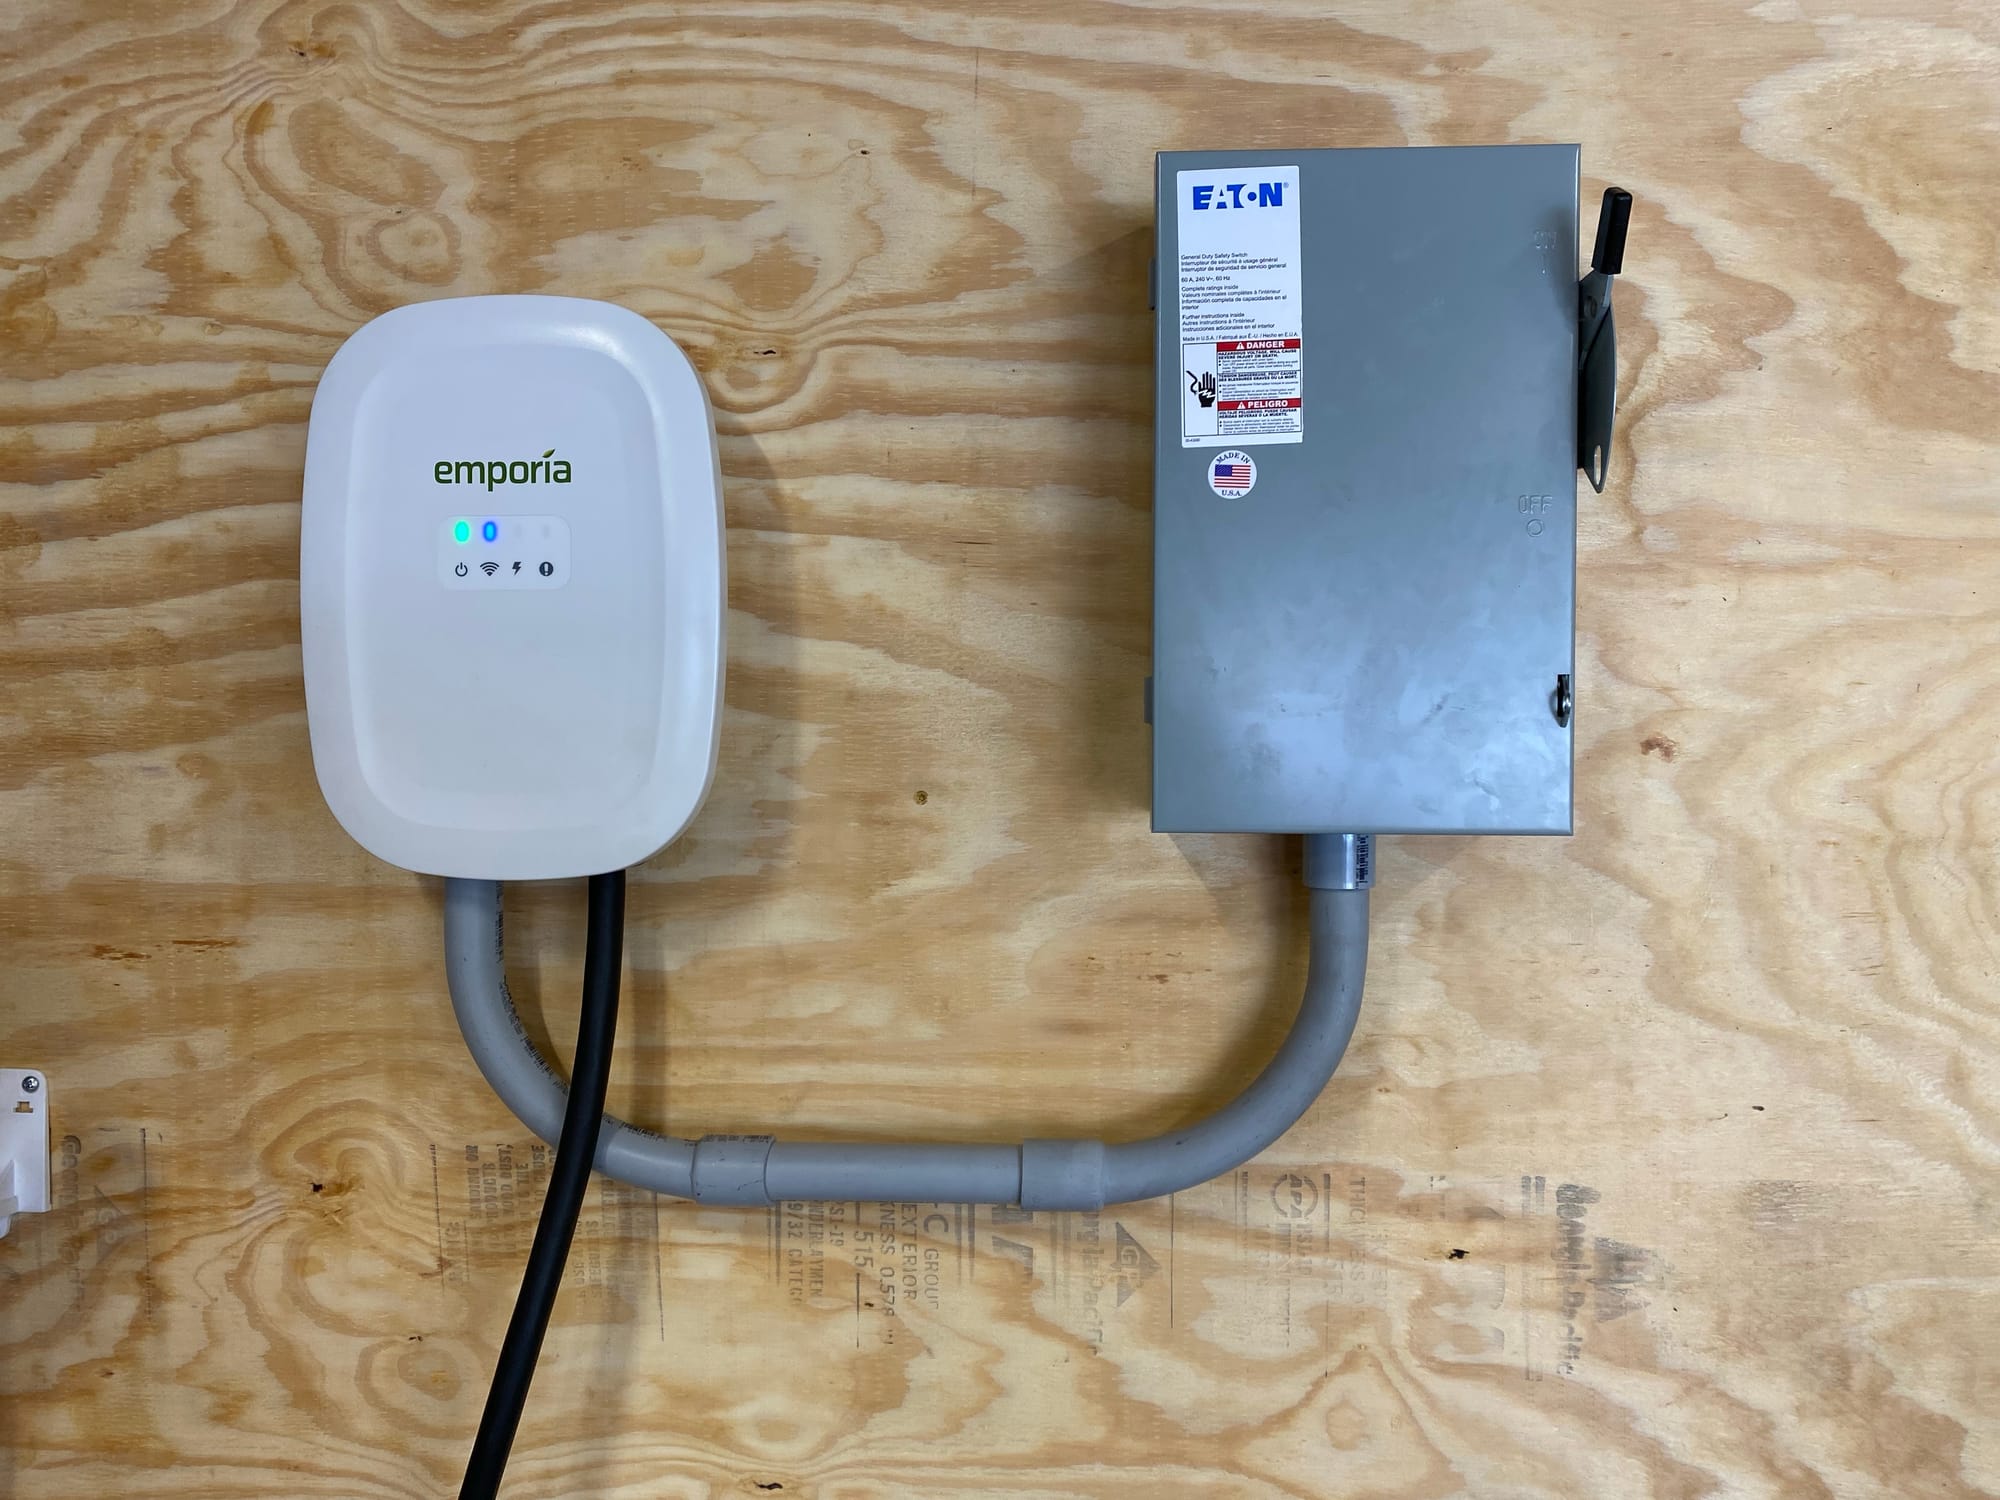
Credit: blog.networkprofile.org
Safety Precautions
Installing an Emporia EV Charger is a step towards embracing sustainable energy, but safety should be your top priority. Whether you’re a seasoned DIY enthusiast or a first-timer, understanding and implementing essential safety precautions is crucial. These measures not only protect you but ensure the longevity of your new charger. Let’s dive into the specifics.
Turn Off Power
Before beginning any electrical installation, ensure the power is turned off at the circuit breaker. This simple step can prevent electric shock. Locate your home’s electrical panel and switch off the main breaker to cut power to the entire house. It might seem excessive, but this guarantees you’re safe from unexpected currents.
Have you ever tried fixing something at home only to realize the power was still on? That jolt of adrenaline isn’t worth the risk when dealing with electricity. Double-check the breaker to confirm it’s off. This precaution is a non-negotiable first step that sets the stage for a safe installation.
Use Personal Protective Equipment
Wearing personal protective equipment (PPE) like gloves and goggles can shield you from potential hazards. Gloves can prevent burns or cuts from sharp tools, while goggles protect your eyes from flying debris. These might seem like minor details, but they make a significant difference in ensuring your safety.
Think about the last time you handled a tricky home project. Did you have all the necessary gear? If not, you likely felt a bit uneasy. Proper PPE provides peace of mind, allowing you to focus fully on the task at hand. Is skipping safety gear worth the risk? Most would agree it’s not.
Remember, the goal is a smooth, safe installation. These precautions are simple, yet they create a foundation for a secure setup. What other steps might you take to ensure your safety during installation? Share your thoughts in the comments below!
Mounting The Charger
Installing the Emporia EV Charger involves securing the mounting bracket to the wall. Follow the guide to ensure proper alignment. Attach the charger securely for safe and efficient use.
Mounting the charger is a crucial step in installing your Emporia EV Charger. Proper mounting ensures safety and efficiency. It also enhances the charger’s durability. Let’s walk through the steps to mount your charger securely.Position The Mounting Bracket
First, choose a suitable location for the mounting bracket. The location should be near your power source. It should also be accessible to your vehicle. Mark the spots on the wall where you’ll drill. Use a level to ensure the bracket is straight. This prevents uneven mounting.Secure The Charger To The Wall
Now, it’s time to secure the charger. Align the charger with the mounting bracket. Use screws to attach the charger firmly to the wall. Ensure the screws are tight. Loose screws can cause the charger to fall. Finally, check the stability by gently shaking the charger. It should remain firm and stable.Wiring The Charger
Wiring an Emporia EV Charger requires attention to detail. Start by ensuring safety measures are in place. A well-wired charger guarantees efficient performance. The next steps guide you through connecting the power supply and installing the grounding wire.
Connect Power Supply
Turn off the main power before wiring. Locate the electrical panel. Identify the dedicated circuit for the charger. Use appropriate wiring tools. Connect the power supply wires to the charger terminals. Match the wire colors correctly. Ensure connections are tight and secure. Double-check the wiring alignment. This prevents future electrical issues.
Install Grounding Wire
Grounding ensures safety during charging. Locate the grounding terminal on the charger. Use a copper wire for grounding. Attach the wire firmly to the terminal. Connect the other end to the grounding rod. This prevents electrical surges. Check the connection. Ensure no loose ends. A secure grounding wire protects your electrical system. Your charger is now wired and safe.
Testing The Installation
Ensure the Emporia EV Charger functions correctly by testing the installation. Verify connections and monitor charging status. Confirm the charger communicates with your vehicle for optimal performance.
Testing the installation of your Emporia EV Charger ensures it works properly. It’s crucial before you start using it daily. This step verifies that the charger is safe and reliable. Follow these simple checks to complete the process smoothly.Power On The Charger
First, switch on the charger. This activates its internal systems. Make sure the power supply is stable. Your charger should start without any issues. Listen for any unusual sounds. They might indicate a problem. A smooth startup is a good sign.Verify Led Indicators
Check the LED indicators on the charger. These lights show the charger’s status. Green usually means it’s functioning well. Red or blinking lights might signal a fault. Look at the user manual for guidance. Each light has a specific meaning. Identifying these helps ensure a successful installation.Final Adjustments
The final adjustments ensure your Emporia EV Charger runs smoothly. These steps enhance safety and optimize charging efficiency. Attention to detail here can prevent future issues. So, let’s look at the critical elements of this process.
Configure Charging Settings
Start by configuring the charging settings. Use the Emporia app or device interface. Adjust the charging power to match your vehicle’s needs. Set the charging schedule based on your daily routine. This helps in managing energy consumption efficiently. Keep in mind, a well-set schedule protects your battery’s health.
Tidy Up Cables And Wires
Next, tidy up cables and wires for a neat installation. Secure the cables with clips or ties. This prevents tripping hazards and keeps the area clean. Ensure no wires are hanging loose. This reduces the risk of damage or accidents. A tidy setup also makes future maintenance easier.
Troubleshooting Tips
Installing an Emporia EV Charger requires checking your power supply and ensuring proper wiring. Follow the manual’s steps carefully for safety. Test your setup for any errors before connecting your vehicle.
Installing an Emporia EV Charger can seem daunting, especially if you encounter unexpected issues. However, with the right troubleshooting tips, you can address most problems on your own, saving both time and frustration. Let’s dive into common issues you might face and how to solve them, as well as when it might be best to call in a professional. ###Common Issues And Solutions
Even with a well-written manual, things can go awry. One common issue is the charger not powering on. Ensure the power source is connected and that your circuit breaker is not tripped. A quick reset can sometimes do wonders. Another problem is slow charging. Check your network connection and the charger settings. You might be using a lower power setting without realizing it. Adjusting the settings can often speed things up. Experiencing interruptions during charging? This could be due to a loose connection. Inspect the connections and cables for any visible damage or misalignment. Tightening the connections can often resolve this hiccup. ###When To Seek Professional Help
Sometimes, DIY troubleshooting isn’t enough. If you’ve exhausted basic solutions and the charger remains unresponsive, it might be time to call a professional. Persistent power issues could indicate a deeper electrical problem that requires expert attention. If you notice sparks, burning smells, or smoke, immediately disconnect the charger and contact a technician. Your safety is paramount, and these signs should not be ignored. When in doubt about complex wiring or if you’re unsure of your troubleshooting steps, seeking professional help is a wise decision. It’s better to be safe and ensure your charger is installed correctly, rather than risking damage or safety hazards. Isn’t peace of mind worth a quick call to an expert? Your EV charger is an investment—protect it by knowing when to hand the reins to a professional.
Credit: www.youtube.com

Credit: www.reddit.com
Conclusion
Installing an Emporia EV Charger is straightforward. First, gather the necessary tools. Make sure to follow each step carefully. Safety should be your top priority. Check the connections twice before powering up. This ensures a smooth operation. Enjoy the convenience of charging at home.
It’s a smart investment for the future. You’ll save time and energy. Your electric vehicle will always be ready. Feel confident about your installation process. Now, your car is ready to hit the road. Happy driving with your new charger!
